
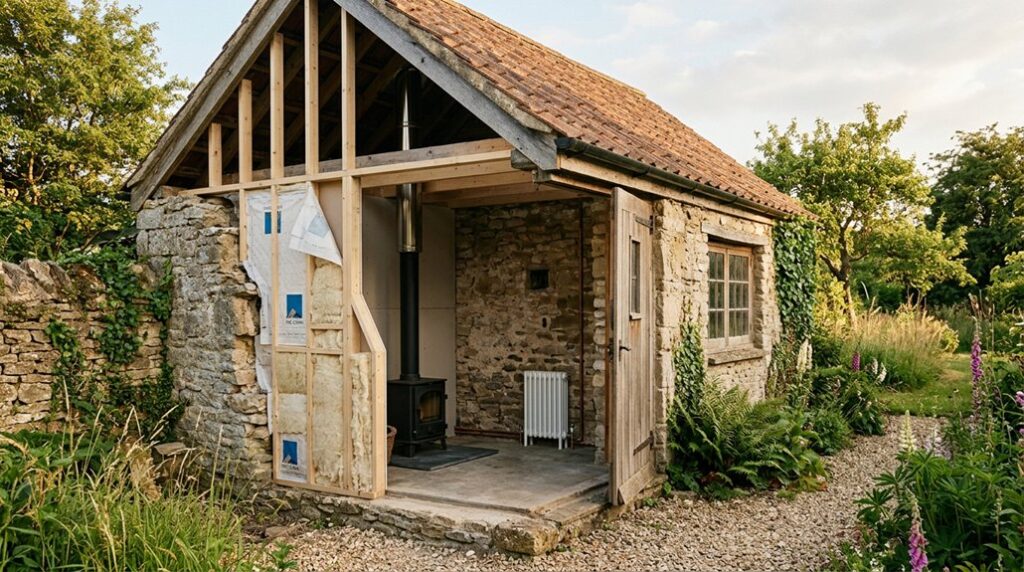
Your stone outbuilding is a quiet boundary between the weather outside and the comfort you want inside. Before you add insulation or heating, inspect the masonry, roof, floor, and drainage, then repair cracks and resolve dampness. Choose breathable materials, maintain airflow, and avoid sealing moisture into historic walls. The right heating system will depend on how often you use the space, but one overlooked detail can undermine every improvement you make.
Key Takeaways
- Inspect masonry, roof, floors, joints, and drainage first; stabilize movement and repair leaks before insulating or heating.
- Confirm wall construction and choose breathable insulation, such as wood fibre, cork, or calcium silicate, rather than impermeable foam.
- Ensure continuous insulation, vapour-open finishes, sealed penetrations, and ventilated roof cavities while allowing masonry to dry.
- Install controllable background and extract ventilation, monitor humidity with a hygrometer, and maintain approximately 40–60% relative humidity.
- Select thermostatically controlled heating suited to usage, provide frost protection, and avoid unvented fuel heaters that add moisture.
Inspect the Stone Outbuilding Before Work Begins
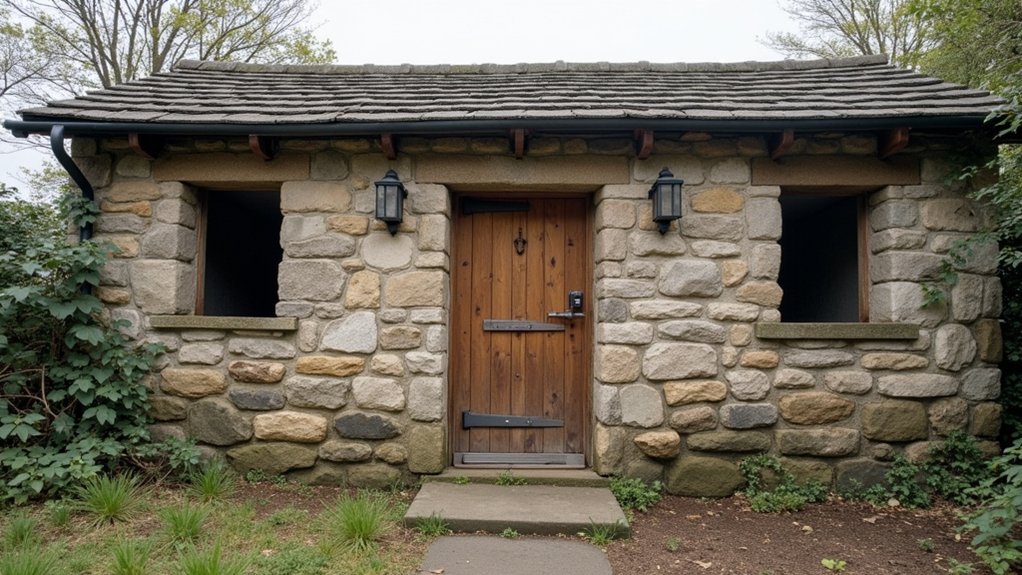
Before insulating or heating the outbuilding, inspect the stonework, roof, floor, doors, windows, and drainage for defects that could undermine the work.
Begin your stone inspection by checking joints, lintels, corners, and wall faces for open cracks, bulging, loose stones, or fresh movement. Record locations and photograph each finding.
Complete a structural assessment before fixing battens, lining walls, or installing heavy equipment; significant displacement or spreading requires advice from a qualified building professional.
Examine roof coverings, timbers, and abutments for missing materials, deflection, or decay.
Check the floor for uneven areas, settlement, and load-bearing capacity, particularly beneath heaters or storage tanks.
Test door and window frames, hinges, glazing, and seals, noting dimensions for later upgrades.
Keep these findings in a repair schedule and resolve structural defects before insulating.
Solve Damp and Drainage Problems First
Before insulating, identify moisture sources such as rising damp, penetrating rain, condensation, or plumbing leaks.
Improve ground drainage by clearing channels, correcting falls, and directing runoff away from the walls.
Then repair defective masonry joints and gutters.
Don’t enclose damp stonework, as trapped moisture can cause frost damage, mould, and insulation failure.
Identify Moisture Sources
You’ll need to identify and correct moisture sources before adding insulation or heating, because trapped damp can damage masonry, promote mould, and reduce insulation performance.
Inspect the roof, flashing, gutters, downpipes, door thresholds, window frames, and wall joints for leaks or failed seals. Look for staining, salt deposits, blistering finishes, soft mortar, and persistently cold patches; use a moisture meter cautiously, since readings vary with salts and stone density.
Check internal plumbing, including supply pipes and waste connections, for concealed leaks. Assess whether rainwater enters through cracked masonry or defective pointing, then repair those defects with compatible, vapour-permeable materials.
Allow wet fabric to dry before lining walls. For condensation control, provide temporary ventilation and maintain moderate background heat while investigating moisture intrusion. Don’t mask symptoms with impermeable coatings or insulation.
Improve Ground Drainage
Ground drainage is a priority when soil, paving, or standing water keeps the outbuilding’s walls damp. First, observe where rainwater collects during storms and trace its flow around the building. Establish a ground slope that falls away from the walls, typically at least 1:40 for the first metre, then maintain a clear, permeable strip beside the stonework.
Remove impermeable paving where it directs runoff inward, or replace it with permeable gravel and a properly compacted sub-base. Where natural grading isn’t sufficient, install drainage systems such as a shallow French drain, channel drain, or soakaway, sized for local rainfall and soil permeability.
Line gravel trenches with geotextile fabric to limit silt blockage, and keep outlets accessible for inspection. Don’t trap water against the building with raised edging or sealed surfaces.
Repair Walls and Gutters
Repair cracked or open-jointed stonework, defective pointing, and failed seals around openings before adding insulation or heating, because moisture entering the wall can become trapped and worsen frost damage, staining, and heat loss.
Arrange wall stabilization where movement, bulging, or displaced stones indicate structural risk; don’t simply cover unstable masonry.
Rake out loose pointing carefully, then repoint with a compatible, vapor-permeable lime mortar rather than hard cement, which can concentrate moisture and damage softer stone.
Check window and door reveals, lintels, flashing, and service penetrations, replacing failed sealants with suitable exterior-grade products.
Complete gutter maintenance before interior work: clear debris, test joints during rainfall, secure loose brackets, and correct poor falls.
Extend downpipes into sound drainage or sealed water butts, keeping discharge away from foundations.
Let masonry dry fully before insulating or heating.
Choose the Right Insulation for Stone Walls
Because stone walls are porous and often uneven, choose insulation that manages moisture rather than simply achieving the highest thermal rating.
First, identify whether you’ve got solid masonry or a genuine wall cavity; don’t inject insulation into an unverified void.
For internal lining, wood-fibre board, cork, or calcium-silicate panels can provide useful thermal resistance while allowing some vapour movement.
Choose compatible insulation materials according to the wall’s exposure, pointing condition, and heating plan.
Avoid impermeable boards or closed-cell foam where they could prevent drying and concentrate moisture at the stone or mortar.
Fit insulation continuously, but leave ventilation details and service penetrations carefully sealed against draughts.
Use a vapour-open plaster or board finish, and follow the manufacturer’s guidance on thickness, fixings, and required air gaps for your specific masonry.
Insulate the Floor and Roof Without Trapping Moisture
You’ll need to control ground moisture before insulating the floor, using a damp-proof membrane, sealed joints, and adequate drainage where appropriate.
Choose a floor system that keeps insulation dry without blocking the stonework’s natural drying path.
At roof level, install continuous ventilation beneath the covering, maintain clear eaves and ridge paths, and use a vapour-control layer on the warm side of the insulation.
Manage Floor Moisture
Manage floor moisture before adding insulation, because a cold stone outbuilding can draw damp through the slab, soil, or masonry and trap it beneath new finishes.
Test the floor with a moisture meter and tape a plastic sheet tightly over representative areas for 24 hours; condensation or darkening indicates active moisture.
Correct drainage outside first, keeping ground levels below the wall base and directing downspouts away from the building.
Repair cracks, then consider a capillary-breaking membrane or a new concrete overlay where the existing slab remains damp.
Choose compatible moisture barriers, and detail their edges so water can’t bypass them at walls.
Use vapor control appropriate to the floor assembly: don’t seal wet masonry behind impermeable layers.
Let repairs dry fully before installing rigid insulation, battens, or finish flooring.
Ventilate the Roof Properly
A ventilated roof assembly needs a continuous path for air to enter at the eaves, move beneath the roof covering, and exit through a ridge or high-level vent. This roof ventilation removes heat and water vapour before condensation damages insulation, rafters, or stonework.
Install rafter baffles to preserve an unobstructed channel, then seal the warm-side vapour-control layer around lights, cables, and wall junctions. For reliable moisture control:
- Fit insect-screened soffit and ridge vents.
- Keep insulation clear of ventilation channels.
- Repair slipped slates and defective flashing.
- Provide cross-ventilation where no ridge vent exists.
- Inspect vents after insulating and roofing.
Don’t block eaves with mortar, insulation, or stored materials. Use breathable roofing membranes where appropriate, but follow the manufacturer’s direction. If the roof lacks ventilation, consult a roofer before closing the ceiling.
Monitor damp patches, mould, and musty smells, especially after heating the outbuilding.
Improve Ventilation for a Healthier Outbuilding
Good ventilation protects an insulated stone outbuilding from condensation, mould, and stale air by replacing humid indoor air with drier outdoor air. Fit controllable background vents low on an external wall and install extract ventilation high on the opposite side to create effective airflow circulation.
Choose vents with insect screens, weather louvres, and adjustable shutters, then keep them unobstructed by insulation, shelving, or stored materials. In a workshop, position extraction near sinks, drying areas, or other moisture sources; connect ducting to the exterior and prevent back-draughts with a non-return flap.
Use a humidity-sensitive extractor where conditions vary, and check grilles regularly for dust and cobwebs. Don’t seal every gap around doors without providing replacement air.
Monitor relative humidity with a hygrometer, targeting approximately 40–60% for reliable moisture control.
Choose Efficient Heating for Your Intended Use
Choose a heating system based on how often you use the outbuilding, how quickly it must warm up, and whether it needs frost protection or continuous background heat. Match output to the insulated floor area and heat loss through stone walls, windows, and doors.
Consider these options:
- Electric heaters: Install thermostatically controlled panel heaters for steady background warmth.
- Infrared panels: Heat occupants and work surfaces quickly, reducing warm-up time.
- Air-source heat pumps: Deliver efficient continuous heating where regular use justifies installation.
- Frost-protection heaters: Maintain a safe minimum temperature for tools, plumbing, and stored materials.
- Solar panels: Offset electrical consumption when daytime generation matches your usage.
Use a programmable thermostat and separate zones if you have distinct areas.
Keep heaters clear of combustibles, provide suitable electrical protection, and have fixed wiring installed by a qualified electrician.
Avoid unvented fuel heaters, which add moisture and combustion gases.
Finish the Space Without Losing Its Character
Once the heating system is set up, finish the interior in a way that protects the stone outbuilding’s original character. Keep exposed masonry visible where it’s sound, and repoint joints with compatible lime mortar rather than hard cement, which can trap moisture.
Use breathable finishes, such as limewash, clay plaster, or mineral paint, over insulated walls to reduce condensation risk.
Install timber lining or freestanding studwork only where necessary, maintaining a ventilated gap and avoiding direct contact with damp stone.
Choose reclaimed or simply detailed wood for doors, shelving, and trim; these decorative finishes complement irregular walls without creating a false historic appearance.
Conceal cables and pipework neatly, but retain accessible inspection points.
Document existing features before alterations to support historical preservation, and check listed-building requirements before removing, covering, or repainting original fabric.
Frequently Asked Questions
Do I Need Planning Permission or Building Regulations Approval for the Conversion?
You’ll usually need Planning permissions if you change the building’s use, size, appearance, or location, while Building regulations approval generally covers structural, insulation, ventilation, electrical, and fire-safety work; check with your local authority first.
How Much Will Insulating and Heating the Outbuilding Typically Cost?
You’ll typically spend £3,000–£12,000, depending on size, moisture control, insulation specification, electrical work, and heating choice. Start with cost estimation and budget planning, then add 10–20% contingency for hidden repairs, ventilation, and professional installation.
Which Electrical Upgrades Are Recommended for a Safely Converted Stone Outbuilding?
You’ll need Electrical safety upgrades: install a dedicated consumer-unit circuit, RCD/RCBO protection, correctly sized wiring, external-rated sockets, proper earthing and bonding, and wiring upgrades inspected and certified by a qualified electrician.
Can I Use the Outbuilding Year-Round During Freezing Winter Temperatures?
Yes, you can use it year-round if you install continuous winter insulation, control moisture, and choose safe heating methods. Protect pipes from freezing, ventilate adequately, monitor temperature, and have electrical systems professionally inspected before occupancy.
How Can I Reduce Noise Transmission Between the Outbuilding and Surrounding Properties?
You’ll reduce noise transmission with soundproofing techniques: seal masonry gaps, add resilient channels, mineral-wool insulation, and dense internal linings. For outdoor equipment, prioritize noise barrier installation using solid, gap-free fencing positioned near the source.
Conclusion
If you’ve assessed the masonry, solved drainage, and chosen breathable insulation, you’ll protect both comfort and historic fabric. Don’t seal the building blindly: moisture control matters more than maximum insulation thickness. Remember, indoor humidity above 60% can encourage mould growth, so use controllable background ventilation and monitor conditions seasonally. Pair efficient, correctly sized heating with vapour-open finishes, lime mortar, and continuous roof ventilation. That approach keeps your outbuilding warmer, drier, safer, and characterful.