

If your Victorian bathroom needs a little modern intervention, start by treating the heritage tiles and sanitaryware as one coordinated system. Match tile undertones, specify dark grout lines, and repeat brass accents across taps, lighting, and hardware. Then balance those cues with restrained curves, concealed plumbing, thermostatic controls, and moisture-resistant finishes. Retain high-level cisterns and timber skirting where possible, but plan the layout carefully—because one overlooked junction can undermine the entire refit.
Key Takeaways
- We chose heritage tiles as the dominant feature, limiting the palette to two or three tones for a calm, coherent Victorian scheme.
- Tile formats and patterns followed the room’s proportions, ceiling height, cornice, skirting, and existing architectural details.
- Modern sanitaryware was selected for reliable performance, compact dimensions, and restrained shapes that complemented the tiles’ geometry.
- Brassware, grout, timber, and sanitaryware finishes repeated deliberate Victorian cues without compromising contemporary comfort or maintenance.
- The layout coordinated circulation, clearances, concealed plumbing, storage, layered lighting, ventilation, and accessible service points before installation.
Set the Victorian Bathroom Design Direction
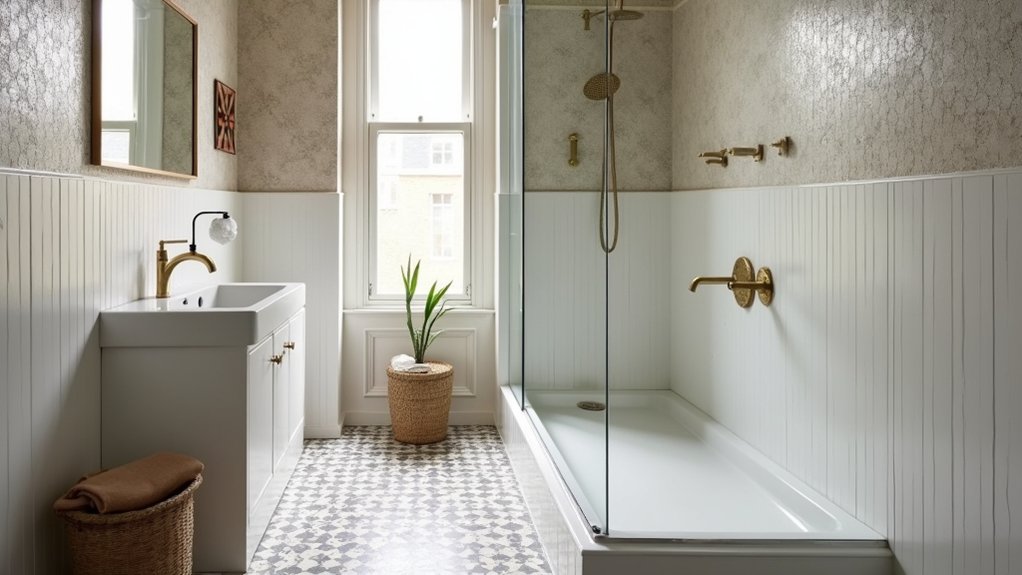
Start by defining the Victorian bathroom’s visual hierarchy: choose one dominant heritage feature, such as patterned encaustic flooring, a decorative wall border, or a cast-iron roll-top bath. Then select modern sanitaryware that supports it without competing for attention.
Establish a controlled palette of two or three tones, using contrast to clarify fixtures, circulation, and focal points rather than imitate every historic detail.
Study the room’s proportions, ceiling height, window placement, and existing joinery before fixing layouts.
Use Victorian motifs selectively through hardware profiles, tap silhouettes, timber detailing, or restrained mouldings.
Specify contemporary basins, toilets, and showers for reliable performance, ensuring their dimensions suit the available clearances.
Apply Restoration techniques only where evidence supports them, repairing original fabric instead of manufacturing unnecessary age.
Confirm ventilation, waterproofing, plumbing routes, and access panels before finalising finishes and installation sequencing.
Choose Heritage Tiles That Suit the Architecture
Choose heritage tiles by reading the bathroom’s architecture rather than treating historical pattern as decoration. Check wall proportions, ceiling height, cornice lines, skirting, and original floor levels before choosing a format.
In a narrow Victorian room, small mosaics or 150mm square tiles can preserve scale without overwhelming the walls. Use vertical brickwork to emphasise height, or a restrained dado band to align with existing joinery.
Pattern coordination matters: relate motifs to the period’s geometry, but limit competing borders, inserts, and contrasting grids.
For material selection, compare glazed ceramic, encaustic cement, and porcelain for thickness, tonal variation, water absorption, and cleaning requirements.
Sample tiles under the bathroom’s actual lighting, then map grout joints against corners, windows, and pipe penetrations.
Confirm substrates can carry the chosen tile and accommodate movement.
Pair Traditional Tilework With Modern Sanitaryware
Pair traditional tilework with modern sanitaryware by repeating one or two deliberate cues, such as a tile’s white ground, dark grout, brass accent, or geometric profile, across the basin, toilet, bath, and fittings.
Use Color coordination to connect surfaces without making every element identical: match the tile’s undertone to the basin, then repeat its darkest line in grout, tapware, or cabinet hardware.
During Material selection, check how glazed ceramic, enamel, chrome, brass, and painted timber interact under bathroom lighting.
Choose sanitaryware with restrained curves or crisp edges that echo the tile pattern’s geometry, while keeping dimensions proportional to the room.
Confirm tap-hole positions, waste locations, projection, and fixing clearances before ordering.
A wall-hung basin can expose more tilework; a close-coupled toilet may provide simpler installation and stronger visual continuity.
Balance Period Details With Contemporary Comfort
Keep period-defining details—such as a high-level cistern, timber skirting, dado rails, or traditional brassware—where they establish the room’s Victorian character. But integrate contemporary comfort through concealed plumbing, thermostatic controls, soft-close seats, efficient flushing, and reliable ventilation.
Select finishes that reinforce Victorian elegance without compromising performance: use ceramic-bodied sanitaryware, durable enamelled cast iron, and moisture-resistant painted timber.
Specify thermostatic shower valves with temperature limits to prevent scalding, and position service access behind removable panels rather than damaging decorative surfaces.
Match exposed brassware to the room’s established metal finish, checking compatibility with water pressure and pipework. Consider underfloor heating, bathroom radiators or towel rails, for the winter months.
Choose heated towel rails with programmable controls, and verify that ventilation achieves suitable air changes after bathing.
You’ll preserve the original visual language while making daily use quieter, safer, warmer, and easier to maintain.
Solve Layout, Lighting, and Storage Challenges

When space is tight, establish clear zones for bathing, washing, circulation, and storage before fixing sanitaryware positions. Check door swings, radiator projections, and required access clearances on a scaled plan.
A wall-hung basin can preserve floor area, while a recessed cabinet keeps toiletries off narrow ledges. Use mirrored storage, but specify moisture-resistant backing and protected electrical connections.
Layer lighting: combine ceiling illumination with shadow-free task lighting at the mirror, then add a low-level night light if the room lacks daylight. Confirm circuit protection and ventilation requirements with a qualified installer.
Coordinate grout lines with fixtures to strengthen color coordination without making the pattern feel busy. Test material compatibility between historic tile surfaces, contemporary sealants, brassware finishes, and cleaning products before installation.
Keep shelves shallow, corners accessible, and controls reachable from outside the shower spray.
Pull the Victorian Bathroom Refit Together
Bring the Victorian bathroom refit together by coordinating the scaled layout, heritage tile setting-out, sanitaryware, lighting, ventilation, and storage before installation begins. Confirm finished floor levels, wall build-ups, service routes, and clearances against the final drawing.
Set tile centres around the basin, bath, and shower controls, then align grout joints with architectural features where possible. Use modern sanitaryware with compact projections and reliable concealed plumbing, but select Vintage fixtures only where their dimensions and performance suit the scheme.
Specify waterproof backer boards, compatible adhesives, flexible grout, and accessible isolation valves. Balance warm task lighting with moisture-rated fittings, and verify extraction capacity and make-up air.
Finish with Antique accessories, sealed timber, and carefully positioned mirrors. Photograph services before closing walls, test every connection, and complete a snagging inspection.
Frequently Asked Questions
What Is the Typical Cost of Refitting a Victorian Bathroom?
You’ll typically pay £8,000–£20,000 to refit a Victorian bathroom, depending on plumbing, structural repairs, fixtures, and finishes. Include ten-percent contingency; careful cost considerations and budget planning help control labour, materials, and unexpected restoration expenses.
How Long Does a Victorian Bathroom Renovation Usually Take?
You’ll usually need three to six weeks; surveys show over half of bathroom renovations exceed schedules. Allow extra time for historical accuracy, material preservation, specialist trades, approvals, drying periods, and unforeseen structural repairs during Victorian refurbishments.
Do I Need Planning Permission for a Victorian Bathroom Refit?
Usually, you won’t need planning permission for an internal Victorian bathroom refit, unless your property’s listed or sits in a conservation area. You’ll still need building regulations approval for structural, drainage, ventilation, electrical, or accessibility changes, supporting heritage preservation.
How Can I Improve Ventilation in a Period Bathroom?
Ironically, your period bathroom needs modern airflow. Install extraction ventilation with a humidistat, duct externally, and prevent condensation. Add window upgrades, such as trickle vents or opening lights, while preserving original frames and detailing.
Which Cleaning Products Are Safest for Heritage Tiles and Modern Fixtures?
Choose pH-neutral, Eco friendly cleaners for heritage tiles and modern fixtures. Avoid bleach, acids, abrasives, and solvent-based products. You’ll protect grout and finishes with diluted solutions, microfiber cloths, and gentle scrubbing.
Conclusion
A successful Victorian bathroom refit works when every decision supports both character and performance. You’ll get the best result by coordinating tile undertones, grout colour, brassware, and sanitaryware proportions rather than treating them separately. Retain defining details—such as timber skirting and a high-level cistern—while specifying concealed plumbing, thermostatic controls, and moisture-resistant finishes. Think of the scheme as a bridge between eras: each material should connect period authenticity with modern comfort, durability, and practical daily use.

