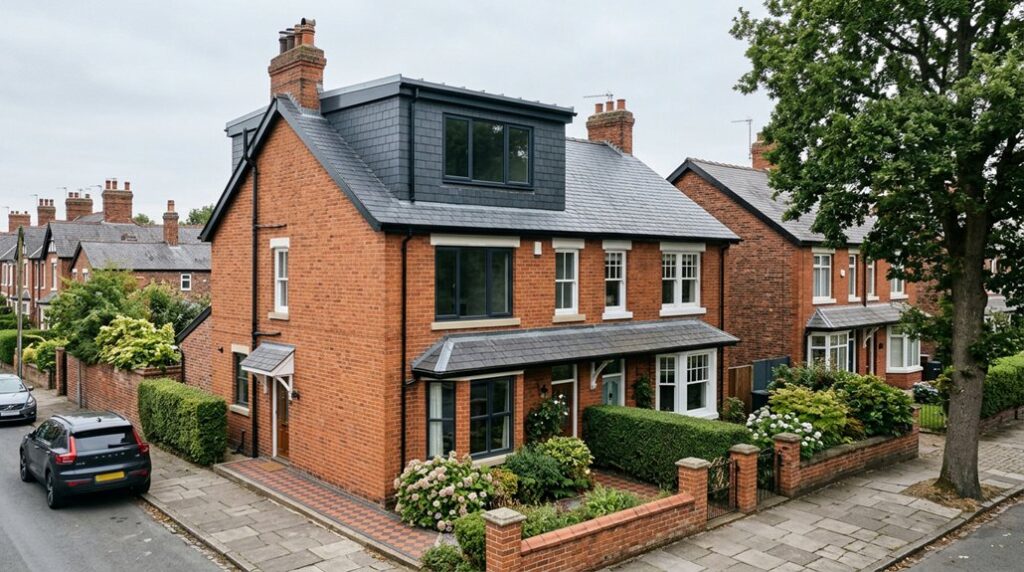
A post-war terrace in Northwich can gain a bright bedroom and shower room by building a dormer into its unused roof space. You’ll need to assess headroom, roof structure, insulation, stair access and natural light before finalising the layout. Planning rules, building regulations and costs also affect the design, while a skilled local team can protect your garden space and add value—provided you resolve one critical structural question first.
Key Takeaways
- A dormer loft conversion in Northwich creates valuable full-height living space without extending into the garden.
- Assess the roof structure, usable floor area, insulation requirements, and stair access before finalising the design.
- Maximise daylight with carefully positioned dormer windows or rooflights while managing privacy, glare, and overheating.
- Check permitted development rights, planning restrictions, and Building Regulations before construction begins.
- Obtain itemised quotations, include a 10–15% contingency, and agree responsibilities, warranties, inspections, and payment stages.
Why Choose a Dormer Loft Conversion in Northwich
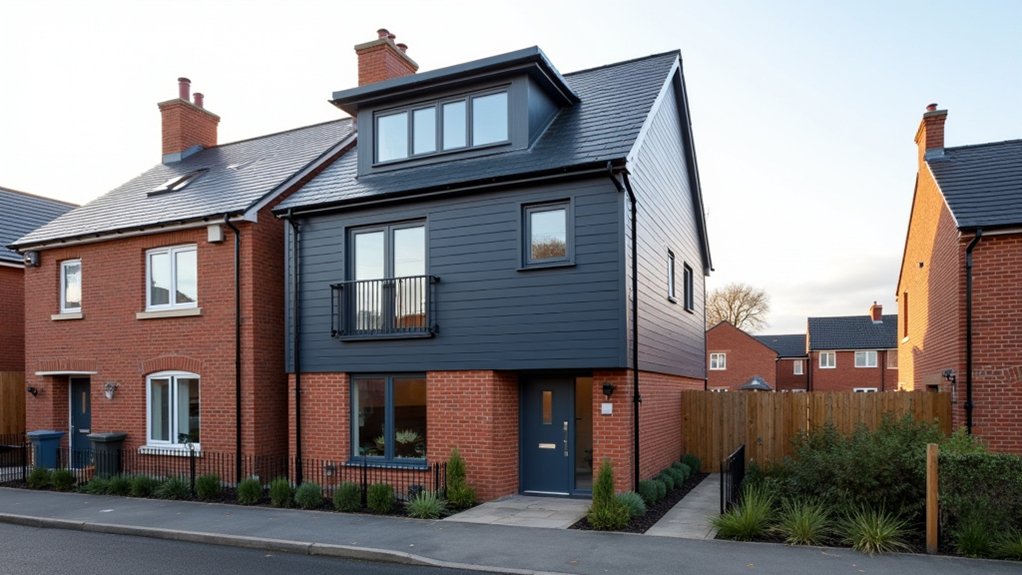
A dormer loft conversion in Northwich creates a practical, full-height room by extending the roof vertically, making the most of otherwise underused space. You’ll gain valuable accommodation without extending your property’s footprint, which can protect garden space and increase resale appeal.
A well-designed dormer can also suit Northwich’s varied housing stock, from post-war terraces to homes influenced by historic architecture. Before committing, you’ll need a structural assessment, accurate surveys, and confirmation that the proposal meets local building codes.
Your designer should check roof structure, fire safety, insulation, drainage, and staircase requirements at an early stage. Planning permission may apply, particularly in conservation areas or where the design alters the roof substantially.
Plan Headroom, Layout and Natural Light
You’ll need to plan headroom carefully, allowing comfortable clearance around the staircase and principal living areas.
Optimise the layout by positioning storage, bathrooms and structural elements where they won’t restrict movement.
Maximise natural light with appropriately sized rooflights or dormer windows, while checking orientation, privacy and planning requirements.
Planning Headroom
When planning headroom for a dormer loft conversion in Northwich, start by mapping the usable floor area beneath the roof structure, not simply the room’s overall dimensions. Measure from the finished floor to the underside of rafters, allowing for plasterboard, flooring and attic insulation.
Mark zones offering at least 2 metres of clearance, then identify areas where sloping ceilings restrict comfortable movement or affect stair access. Your survey should also record existing trusses, purlins and load-bearing walls, because altering them without a structural engineer’s design could compromise roof structural integrity.
Check the proposed dormer’s height against permitted development limits and local planning requirements. You’ll then know whether the available volume supports practical standing space, while preserving adequate insulation depth, ventilation routes and safe construction tolerances beneath the roof covering.
Optimising Layout
Once headroom zones are mapped, plan the layout around how people will use the space rather than forcing furniture into every available corner. Position circulation routes first, keeping stair access clear and allowing safe movement beneath sloping ceilings.
Place desks, wardrobes, or seating where the available height suits their function, then use eaves for fitted storage rather than awkward freestanding units. Coordinate dimensions with structural requirements, fire escape provisions, and service routes before finalising joinery. Your interior aesthetics should support practical zoning, not compromise it.
- Keep at least one unobstructed route between the stair and each occupied area.
- Use low-level cupboards beneath reduced-height roof sections.
- Allow access panels for plumbing, electrics, and ventilation.
- Coordinate insulation techniques with roof build-up and storage depth.
A scaled furniture plan will expose pinch points early, helping you refine the dormer’s arrangement before construction begins and protecting usable floor area.
Maximising Natural Light
Natural light should be planned alongside headroom and circulation, because window placement affects both the room’s character and its usable floor area. In your Northwich dormer conversion, position rooflights over work zones, stair landings, or circulation routes where they won’t conflict with structural members or reduce standing height.
Careful Skylight placement can deliver even illumination while preserving valuable wall space for storage and furniture. Size openings according to the room’s proportions, orientation, and overheating risk; south-facing glazing may require solar control.
Add suitable Window treatments, such as recessed blinds or light-filtering shades, so you can manage glare, privacy, and heat without obstructing the opening. Coordinate every aperture with insulation, flashing, and ventilation details.
This approach creates a brighter, more comfortable loft while protecting energy performance and everyday usability.
Check Northwich Planning Permission Requirements
Before finalising your dormer design, check whether it falls under permitted development or requires planning permission from Cheshire West and Chester Council. Your Northwich property may face limits on height, volume, roof alterations, materials, and its position on the principal elevation.
Conservation areas, listed-building status, and local zoning restrictions can impose additional controls, so confirm these constraints before instructing construction.
Check the following carefully:
- Permitted-development volume and height limits
- Distance from roof edges, eaves, and original ridge
- Privacy impacts from overlooking windows
- Conservation-area or listed-building requirements
You’ll also need to comply with Building codes, including structural stability, fire safety, insulation, ventilation, stairs, and escape provisions. Ask the council’s planning team or a qualified designer to review scaled drawings, site context, and ownership boundaries.
Keep written approvals and conditions, because inspectors or solicitors may request evidence later.
Budget for Your Dormer Loft Conversion
Set a realistic budget for your Northwich dormer loft conversion by accounting for design fees, structural calculations, planning applications, Building Regulations approval, construction, insulation, windows, stairs, plumbing, electrics, finishes, and VAT.
Obtain itemised quotations so you can separate material costs from contractor fees and identify exclusions early. Ask each contractor to confirm whether scaffolding, waste removal, temporary protection, and structural steelwork are included.
Keep a contingency of around 10–15% for concealed defects, specification changes, or price movements.
Check payment schedules, insurance, warranties, and variation procedures before signing a contract.
Your surveyor or architect can help compare quotes on a like-for-like basis, while current local rates will improve accuracy.
Avoid choosing solely on the lowest price: an unrealistically cheap tender may indicate omissions, inadequate specification, or insufficient allowances.
Turn the Loft Into Practical Living Space
You’ll maximise usable floor space by planning furniture layouts around the dormer’s full-height areas and retaining clear access routes.
Design flexible living zones with built-in storage, adaptable furniture, and suitable power points for changing needs.
Position roof windows and dormer glazing carefully to improve natural light while controlling heat gain and privacy.
Maximise Usable Floor Space
How can a dormer loft conversion deliver more than extra square metres? By planning every usable dimension, you can create comfortable, efficient accommodation rather than a storage void.
Position the dormer to increase headroom where you need it most, while retaining practical circulation around stairs, doors, and windows. A measured survey helps you avoid awkward residual spaces and confirms whether structural alterations require steelwork.
Prioritise these details:
- Align the stair opening with existing floor structure to reduce lost area.
- Use built-in eaves storage for low-height zones.
- Specify slimline roof windows to improve daylight without sacrificing wall space.
- Coordinate ventilation systems with insulation techniques to protect comfort and compliance.
You’ll also need accurate floor-to-ceiling calculations, especially around roof slopes. Choose compact radiators, concealed services, and carefully scaled door swings.
This disciplined approach makes the dormer feel larger, warmer, and genuinely practical.
Create Flexible Living Areas
A well-planned dormer loft can serve as a bedroom, home office, guest suite, or quiet retreat without feeling cramped. Define zones with furniture placement, rather than permanent partitions, so you can adapt the room as your needs change.
Multi purpose furniture, such as a sofa bed, fold-down desk, or storage ottoman, preserves usable circulation and reduces clutter.
Specify built-in cupboards beneath the eaves to organise clothing, equipment, and bedding efficiently.
Plan power outlets, data points, and heating controls for each intended use before construction finishes.
Acoustic insulation within stud walls and the floor structure can limit sound transfer between the loft and rooms below, improving comfort and privacy.
Choose durable, easy-clean finishes, and maintain clear access to windows, stairs, and fire-escape routes.
This approach keeps your Northwich conversion practical long-term.
Improve Natural Light
Thoughtful daylight planning can make your dormer loft feel larger, brighter, and more practical throughout the day. Start with window placement: position rooflights or dormer glazing to capture consistent light while protecting privacy and preserving wall space for furniture. Larger openings may require structural reinforcement, so your designer should coordinate lintels, insulation, and ventilation early.
Use these measures to balance brightness and comfort:
- Face rooflights towards available daylight, not neighbouring properties.
- Specify low-energy glazing to control summer heat and winter heat loss.
- Add light diffusors where direct sun creates glare on screens or worktops.
- Use pale, matt finishes to reflect light without harsh reflections.
You’ll also benefit from layered lighting. Combine dimmable ceiling fittings, task lamps, and low-level illumination, then connect controls to separate circuits. This approach keeps your loft useful after sunset and helps you adapt lighting for work, relaxation, or guests.
Choose the Right Northwich Loft Conversion Team
Choosing the right Northwich loft conversion team starts with verifying experience, technical competence, and local building knowledge. Ask to see completed dormer projects similar to yours, then check independent reviews, insurance, and relevant certifications. Your contractor should explain the design, quotation, programme, and Building Regulations requirements without ambiguity.
Confirm who’ll calculate loads, specify steelwork, and protect your home during construction. Detailed drawings should show insulation thicknesses, ventilation routes, fire protection, stair geometry, and escape provisions.
Discuss Roof insulation early, because correct detailing prevents thermal bridging, condensation, and wasted space. Request evidence that the proposed structure will maintain Structural integrity, including calculations from a qualified engineer where necessary.
Before signing, clarify payment stages, variations, warranties, waste removal, and responsibility for inspections. A reliable team will communicate clearly, document decisions, and coordinate every trade from design through completion.
Frequently Asked Questions
How Long Does a Typical Dormer Loft Conversion Take to Complete?
A typical dormer loft conversion takes eight to twelve weeks to complete once construction begins. You’ll need additional time for planning, structural calculations, approvals, cost considerations, material lead times, and design flexibility during detailing.
Can I Stay in My Home During the Dormer Conversion?
Yes, you can usually stay home during a dormer conversion, but expect noise, dust, restricted access, and temporary services. Protect Interior decor, discuss Roof aesthetics, and coordinate schedules, safety barriers, and weatherproofing with your contractor.
What Type of Insulation Is Best for a Northwich Dormer Loft?
You’ll usually get the best performance from rigid PIR insulation between and beneath rafters, achieving required U-values without sacrificing space. Pair suitable insulation materials with continuous attic ventilation to control condensation and moisture.
How Will a Dormer Conversion Affect My Home Insurance?
A dormer conversion can radically reshape your insurance implications: notify your insurer before work starts, confirm structural and contents coverage, and expect policy adjustments, revised rebuild values, inspections, and potentially higher premiums.
What Maintenance Does a Dormer Loft Conversion Require?
You’ll need to inspect roof coverings, flashing, gutters, windows, and insulation annually. Check roof ventilation, monitor moisture, clear drainage, and review structural reinforcement for movement. Repaint timber, service electrics, and repair defects promptly to prevent costly damage.
Conclusion
A dormer loft conversion in Northwich can turn unused roof space into your home’s brightest, most adaptable level. With careful attention to headroom, insulation, structural calculations, fire safety and planning requirements, you’ll build upwards with confidence rather than compromise. Choose a skilled local team, set a realistic budget and define your layout early. Done properly, your new room won’t just add floor space—it’ll give your home another dimension, while protecting your garden and strengthening its long-term value.

