
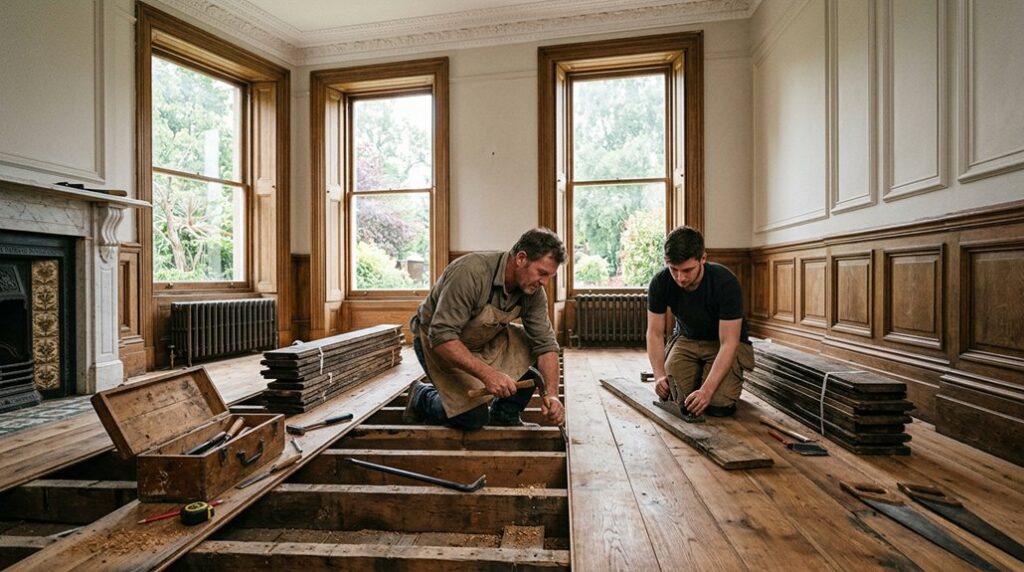
Replacing original oak flooring in a period home starts with more than choosing attractive boards. You need to establish whether the existing floor can be repaired, inspect the joists and subfloor for moisture or pests, and identify the building’s traditional flooring style. If replacement is necessary, reclaimed or carefully matched new oak can preserve the room’s proportions and character. The right installation method and breathable finish matter just as much—but the first decision may determine everything that follows.
Key Takeaways
- Inspect boards, joists, bearers, and subfloor for rot, damp, insects, movement, and unsafe fixings before replacing flooring.
- Identify the original flooring style by recording board dimensions, saw marks, jointing, layout, and adjoining-room evidence.
- Choose sound reclaimed oak for authentic age and patina, or appropriately graded new oak for consistent dimensions and performance.
- Match replacement boards to the originals’ width, thickness, colour, direction, layout, and finish before installation.
- Acclimatize timber, use suitable reversible fixings and expansion gaps, and protect it with breathable finishes and gentle maintenance.
Check Whether the Original Oak Floor Can Stay
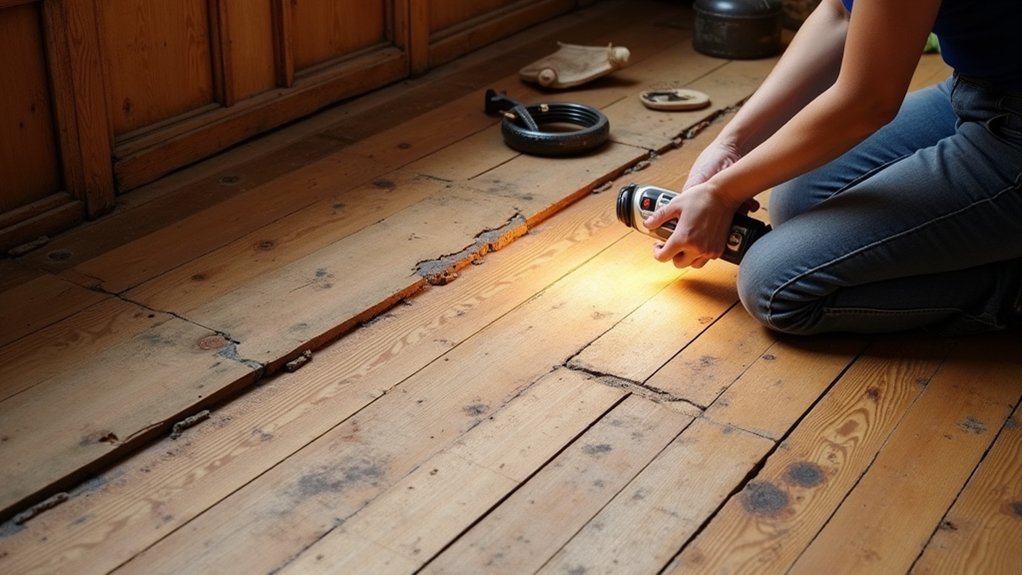
Before planning a replacement, establish whether the original oak floor is structurally sound and worth conserving. Lift a few accessible boards, then inspect joists, bearers, and the subfloor for rot, insect damage, damp, or movement. Test moisture levels and check whether boards flex, squeak excessively, or have unsafe fixings.
A heritage contractor can assess localised defects and recommend careful repairs, including splicing damaged sections, resetting loose boards, or replacing only irreparable timber. Don’t sand aggressively: excessive removal can erase wear patterns and reduce board thickness.
Address the cause of deterioration, such as leaking plumbing or poor ventilation, before making cosmetic decisions. If conservation proves practical, retain the oak and improve performance beneath it with compatible soundproofing solutions.
Choose Modern flooring only when deterioration, safety, or irreversible alteration makes retention impractical.
Identify Your Period Home’s Flooring Style
Identify the floor’s original style before selecting replacement boards, because period homes often used regionally specific oak widths, grades, cuts, and installation patterns. Examine surviving boards for face width, thickness, growth-ring orientation, saw marks, and edge treatment. Note whether boards are riven, radially sawn, quarter-sawn, or converted by a later machine, then record their jointing: square edges, chamfers, rebates, or tongue-and-groove profiles.
Map board direction and layout, including straight runs, herringbone, parquet, borders, and thresholds. Check adjoining rooms and concealed areas for evidence where visible flooring has been altered. Photograph details and measure repeatedly; small variations can distinguish an authentic scheme from Modern flooring.
This documentation supports Historic preservation by defining the visual and construction character your replacement work must respect, without imposing contemporary uniformity on the house’s historic fabric.
Choose Reclaimed or New Oak Flooring
Choose reclaimed oak when matching an existing floor’s age, patina, dimensions, and tooling marks is the priority, but verify that each board is sound, free from active insect damage, and dry enough for indoor installation. Reclaimed boards bring Vintage charm and can preserve evidence of traditional craftsmanship, yet their previous use may leave concealed nails, uneven thickness, or weakened edges.
Ask your supplier about provenance, moisture readings, grading, and any chemical treatments. Sustainable sourcing also means confirming that timber comes from legitimate salvage rather than undocumented removal.
Choose new oak when you need consistent structural performance, reliable availability, or sufficient quantities for a larger repair. Specify a suitable grade and allow boards to acclimatise indoors before fitting.
Your installer should assess subfloor conditions and repair methods before ordering, so the replacement remains compatible with the building’s age and construction.
Match Board Width, Colour, and Finish
Measure the original boards carefully, then specify replacement oak with the same width and, where appropriate, thickness.
You’ll need to compare samples in the room’s natural light so the new timber matches the existing colour and grain.
Replicate the original finish—whether waxed, oiled, or lightly worn—without over-restoring its historic character.
Match Original Board Width
When replacing original oak flooring in a period home, match the existing board width before selecting colour or finish, as inconsistent proportions can make the new floor look conspicuously modern.
Measure several exposed boards, because historic floors often vary slightly through hand production, later repairs, or local movement. Record the usable face width, not the tongue, groove, or damaged edge. If boards are covered, lift a threshold board or inspect beneath a removable fitting rather than guessing from room proportions.
Choose replacement oak milled to the closest practical dimension, then confirm its thickness matches the adjoining floor so progression remains level. Where exact manufacture isn’t possible, use a consistent width that reflects the dominant original size.
Careful sizing supports historical authenticity, simplifies lifespan maintenance, and prevents awkward cuts at walls, doorways, and stair landings.
Replicate Colour And Finish
Colour and finish should follow the surviving floor’s age, wear, and light exposure rather than a showroom sample. Begin by cleaning a representative section, then photograph it under consistent lighting. Note the oak’s undertones, oxidation, staining, and areas where traffic has polished the surface.
Ask your installer to prepare several sample boards using the proposed stain, oil, wax, or lacquer, and compare them beside both worn and protected boards.
Prioritise color consistency across the replacement area, but don’t force uniformity that erases the floor’s history. A subtly varied stain may better reflect naturally aged oak than a single opaque colour.
Match the original sheen and finish texture: a hand-rubbed, open-grain surface won’t resemble a thick, glossy coating. Test drying time and maintenance products, then approve the finish before installation.
Allow samples to cure fully; colour often deepens as oils oxidise.
Install Replacement Oak Flooring Correctly
Once the subfloor is sound, dry, and level, you can install the replacement oak boards using the original floor’s direction, board widths, and fixing pattern as your guide. Acclimatise the timber in the room, then check moisture levels before cutting.
Leave the specified perimeter expansion gap, allowing for seasonal movement without disrupting skirtings or thresholds. Where boards meet, stagger end joints and keep them over suitable support.
Use secret nails or screws that match the historic fixing method; pre-drill near board ends to prevent splitting. Choose flooring adhesives only when the subfloor and manufacturer’s instructions permit them, and avoid trapping moisture.
If you’re installing over underfloor heating, confirm the system suits solid oak, limit surface temperature, and raise heat gradually. Keep boards aligned, tight, and level throughout installation.
Protect the Floor’s Character for Years
Protect the floor’s character by using a breathable finish suited to historic oak, such as hardwax oil or a compatible traditional coating, rather than an impermeable seal that could trap moisture. Apply thin, even coats, follow the manufacturer’s drying times, and test the finish on an inconspicuous board first.
Preserve original tool marks, colour variation, and natural wear instead of pursuing a uniformly new appearance.
During cleaning, use a soft brush or vacuum and a barely damp mop; avoid steam, excess water, and harsh detergents.
Fit felt pads beneath furniture, maintain stable indoor humidity, and place absorbent mats at entrances.
Schedule periodic re-oiling where traffic demands it, recording products and treatments for future historical preservation.
Thoughtful modern renovation should remain reversible, allowing future conservators to assess and repair the oak responsibly.
Frequently Asked Questions
Can Replacement Oak Flooring Improve Your Home’s Insulation and Energy Efficiency?
Yes, replacement oak flooring can improve your home’s insulation when you install suitable underlay and seal gaps. As a flooring material, oak limits draughts; acoustic insulation also reduces sound transfer between rooms and floors.
Are There Planning Restrictions When Replacing Oak Flooring in a Listed Period Home?
Yes—planning restrictions can be monumental. You’ll typically need listed-building consent before altering original oak flooring; consult your conservation officer, document existing fabric, and pursue planning permissions that respect historic preservation requirements.
How Much Does Replacing Original Oak Flooring Typically Cost?
You’ll typically pay £80–£180 per square metre, including reclaimed oak, installation, and finishing. Costs rise for intricate Wood grain matching, subfloor repairs, specialist labour, and conservation-approved Finishing options; obtain itemised quotes before proceeding.
Can Underfloor Heating Be Installed Beneath Replacement Oak Boards?
Yes, you can install underfloor heating beneath replacement oak boards—because even historic floors deserve modern toes. Check heating compatibility, choose engineered oak, limit temperatures, and add underfloor insulation carefully to protect moisture balance and heritage fabric.
How Long Does a Replacement Oak Floor Usually Take to Settle?
You’ll usually see replacement oak flooring settle within two to four weeks, though seasonal movement may continue longer. Allow proper acclimatisation, thorough subfloor preparation, and compatible Flooring adhesives; monitor gaps, moisture, and movement before finishing.
Conclusion
Replacing original oak flooring in a period home isn’t simply a renovation—it’s stewardship. By inspecting existing boards, joists, and subfloor, you’ll resolve moisture or pest damage before it spreads. Select reclaimed or carefully matched new oak, then reproduce the original width, layout, fixing method, and breathable finish. With expert guidance and patient installation, your floor can feel as though it belongs in the house’s first chapter, while meeting today’s standards for stability, durability, and everyday life.

