

If you’re restoring an original stone fireplace, start by treating it as both a historic feature and a structural system. Inspect the hearth, firebox, chimney connection, stones, and joints before disturbing any material. Identify the stone and select a compatible, breathable mortar rather than defaulting to modern cement. Careful repointing, authentic stone replacement, and proper curing can preserve its character—but hidden defects may still threaten safe operation, making a final professional assessment essential.
Key Takeaways
- Inspect and document the entire fireplace, chimney, hearth, lintel, and surrounding masonry before disturbing historic materials.
- Identify the original stone’s composition, texture, weathering, and tool marks to guide authentic repairs and replacements.
- Remove only failed mortar, then repoint joints with compatible, breathable mortar applied carefully in matching profiles.
- Replace missing stones with matching regional material, shaped using appropriate tools and bedded in lime-based mortar.
- Before use, obtain professional chimney clearance, repair firebox defects, install safety equipment, and monitor initial small fires.
Inspect the Fireplace Before Making Repairs
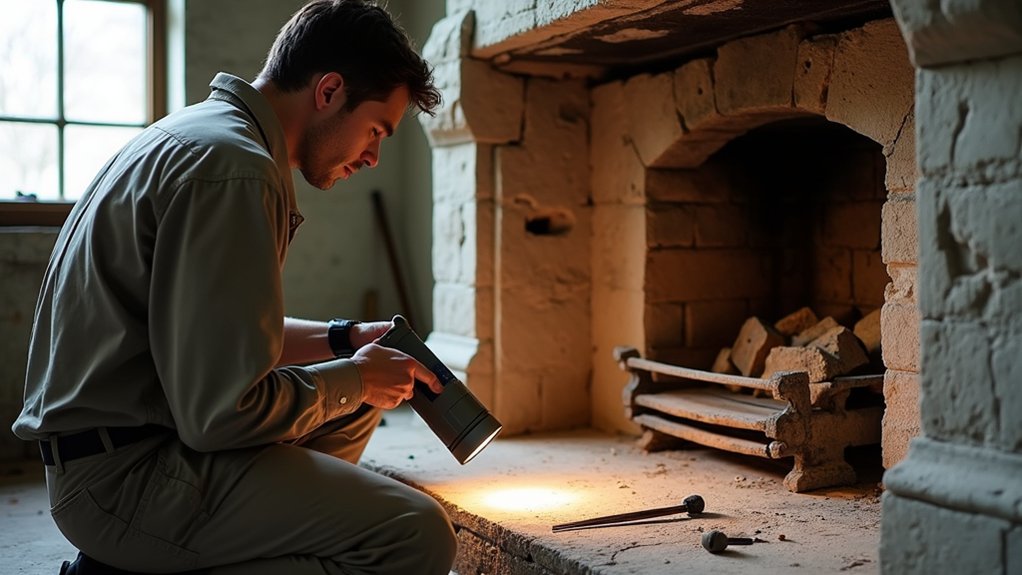
Before repairing an original stone fireplace, inspect the entire assembly for loose or displaced masonry, open joints, cracked stones, water damage, and signs of chimney movement.
Work from the hearth through the firebox, smoke chamber, damper, and visible chimney, documenting each condition with photographs and measured notes.
Don’t disturb unstable stones, soot deposits, or historic finishes during this initial survey.
Check the lintel, mantel, hearth extension, and surrounding wall for settlement, staining, or heat-related deterioration.
Test the damper only if it moves freely, and keep the firebox unused until a qualified professional confirms safe operation.
Look for nesting, debris, and blocked flues from a safe position; never enter the chimney without proper training.
These Maintenance tips support Historical accuracy by preserving evidence of original construction before intervention begins.
Identify Stone and Choose Compatible Mortar
Identify the fireplace’s stone by comparing color, grain, mineral content, surface texture, weathering, and tool marks across the hearth, firebox, mantel, and surrounding masonry. Record observations before Stone cleaning, which can erase soot patterns or historic finishes. Use a conservator’s guidance when stones look similar but react differently to acids, water, or heat.
- Dense granite may show crystalline flecks and sharp, durable edges.
- Limestone often displays pores, fossils, and softer tooling marks.
- Sandstone typically reveals visible grains, layered bedding, and variable absorption.
Choose mortar that matches the stone’s strength, permeability, color, and historic composition. A lime-based mortar usually accommodates movement better than hard Portland cement, which can trap moisture and damage softer masonry. Test small, unobtrusive samples first.
During Mortar mixing, measure consistently, avoid additives, and document the approved formula for safe, authentic restoration. Wear eye protection and gloves.
Repoint Damaged Joints Without Harming Stone
Once you’ve approved a compatible mortar, remove only the loose or failed joint material, preserving the surrounding stone edges and historic tooling. Use hand tools and shallow passes; don’t grind into the masonry or widen sound joints. Wear eye protection, gloves, and a suitable respirator, especially when dust accumulates.
Before repointing, brush and gently vacuum the joint, then lightly dampen it so the stone won’t draw moisture from fresh mortar. Avoid chemical cleaning unless testing confirms it won’t damage the stone or historic surface.
Pack the mortar firmly in lifts, matching the joint’s original profile rather than smearing the face. Tool it when thumbprint-hard, then protect it from rapid drying, frost, and rain. Don’t apply modern sealants: they can trap moisture, impede drying, and accelerate stone decay.
Inspect curing daily.
Replace Missing Stones With Authentic Materials
When a stone is missing rather than merely damaged, select a replacement that matches the original in type, color, texture, density, and dimensions—not just its appearance. For Historical accuracy, study adjacent stones, archival photographs, quarry records, and tool marks before specifying a substitute.
Careful Material sourcing may lead you to a regional quarry, salvage yard, or reputable architectural-materials supplier.
- Compare grain, bedding planes, and weathering across the opening.
- Choose sound stone without hidden cracks, soft inclusions, or salt damage.
- Order a slightly oversized piece for precise trimming and fitting.
Have a qualified mason shape the replacement with compatible hand tools, preserving the fireplace’s coursing and face texture.
Dry-fit it first, then bed it with an appropriate lime-based mortar that respects the historic masonry. Don’t use cement-rich mortar merely for convenience; its rigidity can damage neighboring stone.
Record the stone’s origin and installation date for future conservation work.
Improve Fireplace Safety Before Using It

Before you use a restored stone fireplace, have a qualified chimney professional inspect the firebox, flue, chimney cap, and surrounding masonry for structural defects, blockage, creosote, and signs of heat damage. Ask the professional to verify chimney ventilation and confirm that the liner suits your fuel type and appliance.
Repair cracked firebrick, loose joints, deteriorated mortar, and unstable stones before lighting a fire; never conceal active defects with cosmetic finishes.
Install a properly sized, listed damper if the original remains unsafe or missing, and fit a secure spark screen or glass doors.
Choose Fireplace accessories made from noncombustible materials, including sturdy tools and a covered ash container.
Keep combustibles well away from the hearth, test carbon-monoxide alarms, and burn only seasoned, dry wood.
Start with small fires and monitor smoke, odors, and masonry movement.
Frequently Asked Questions
How Often Should a Restored Stone Fireplace Be Professionally Inspected?
You should schedule a professional inspection annually, or after any chimney event, earthquake, moisture intrusion, or structural change. Use a Maintenance schedule and Inspection checklist to verify masonry, liners, flashing, joints, clearances, and safely functioning dampers.
Can Original Fireplace Hardware Be Preserved During Restoration?
Yes, you can preserve original fireplace hardware through careful removal, documentation, cleaning, and corrosion control. Prioritize hardware preservation and authenticity maintenance, but don’t reuse weakened components until a qualified professional confirms their safety.
What Permits Might Be Required for Historic Fireplace Restoration?
You’ll need permits for structural changes, masonry repairs, chimney work, or alterations affecting egress and fire safety. Consult Historic preservation officials and verify Building codes; your local authority may require specialized approvals.
How Can Soot Stains Be Removed Without Damaging Original Stone?
You can begin soot removal with gentle dry Cleaning methods: vacuum loose deposits using a soft brush, then test a pH-neutral conservation cleaner. Don’t use acids, abrasives, pressure washing, or saturated applications; consult a conservator first.
Should a Restored Fireplace Be Covered When Not in Use?
Yes, you should use breathable fireplace covers when the hearth isn’t operating. Choose preservation techniques that block dust and pests while allowing ventilation; avoid airtight plastics, which can trap moisture and damage original stone or masonry.
Conclusion
When you restore an original stone fireplace, inspect before disturbing, identify before replacing, and stabilize before firing. Repoint joints gently, match stones carefully, and let every repair cure properly. Don’t sacrifice historic fabric for convenience, and don’t sacrifice safety for appearance. Before you use the hearth, have a qualified professional verify its structure, flue, damper, and clearances. With measured techniques and compatible materials, you’ll preserve authentic craftsmanship while creating a fireplace that’s safe, sound, and enduring.

