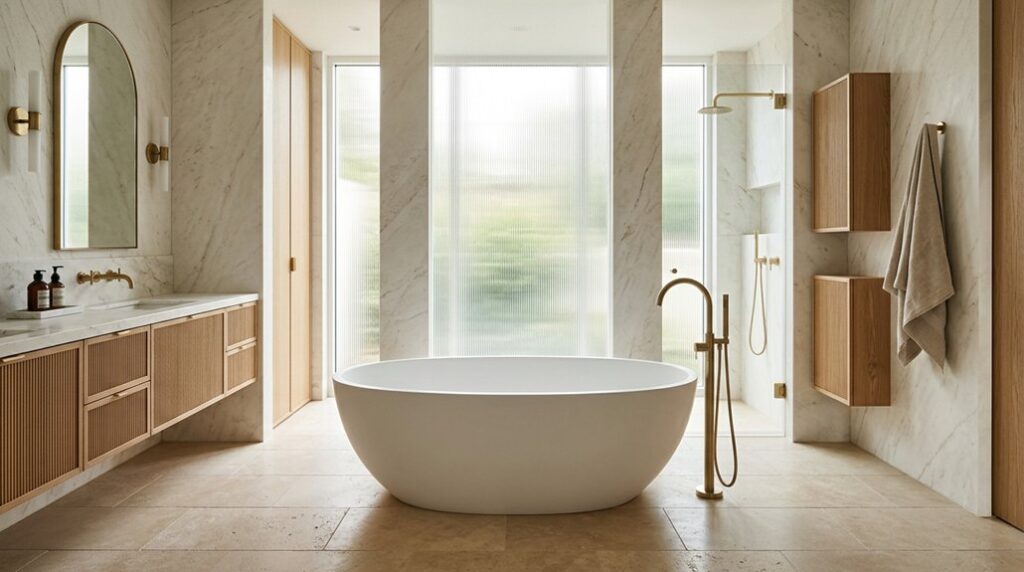
If you want a freestanding bath to define your luxury bathroom refit, you need to treat it as an architectural feature rather than a standalone fixture. Start by planning the layout around its proportions, sightlines, plumbing requirements, and relationship with light. Then refine its impact through sculptural form, coordinated finishes, and carefully selected fittings. The result depends on decisions made before installation—especially one placement detail that can determine whether the bath commands the room or competes with it.
Key Takeaways
- A sculptural freestanding bath became the room’s visual anchor through its distinctive silhouette, balanced proportions, and carefully selected finish.
- Strategic placement aligned the bath with the entrance, window, and architectural geometry while preserving circulation and clear sightlines.
- Coordinated stone, brass, porcelain, and consistent hardware finishes reinforced the bath’s luxurious presence without overwhelming the room.
- Layered, dimmable lighting highlighted the bath’s material qualities, controlled glare, and created a calm, refined atmosphere.
- Early planning of plumbing, structural support, drainage, waterproofing, and service access ensured the focal installation remained practical and durable.
Why the Freestanding Bath Stole the Show
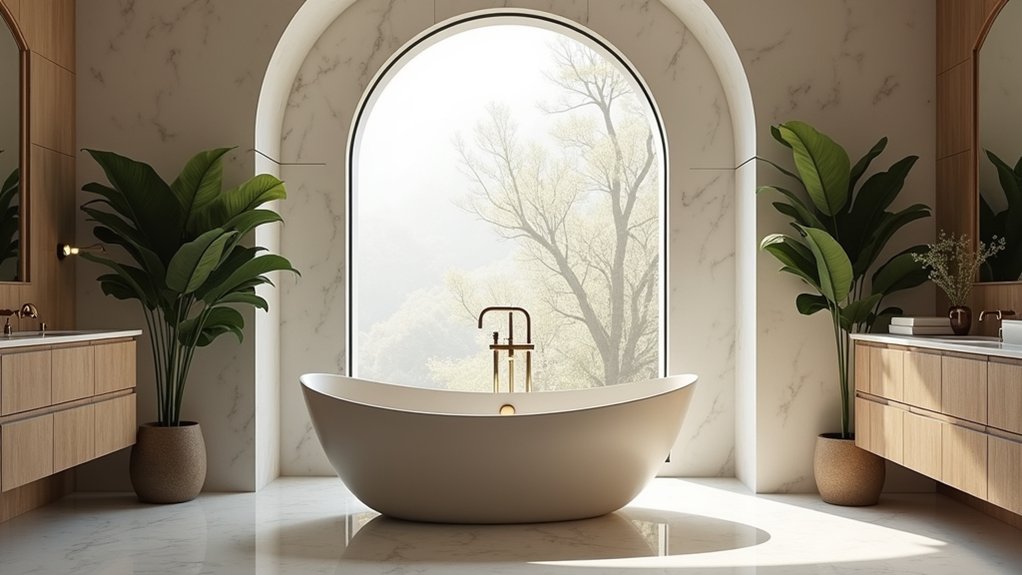
A freestanding bath became the focal point because its sculptural form commands attention without relying on surrounding decoration. You experience that impact immediately: the exposed silhouette establishes a clear visual anchor, while the uninterrupted perimeter highlights refined proportions and controlled curvature.
Historical influence strengthens its authority, recalling roll-top and pedestal designs that once signalled luxury through craftsmanship rather than ornament. Material selection also determines how convincingly the bath dominates.
Enamelled steel delivers crisp edges and a reflective surface; cast stone provides substantial mass and a softer, mineral appearance; solid-surface composites allow precise, seamless geometry. You’ll notice that each option changes light distribution, tactile character, and perceived weight.
Plan the Bathroom Layout Around the Bath
How should you plan the room once the bath has become its focal point? Establish clear sightlines from the entrance, then position the bath where it commands attention without obstructing circulation. Maintain recommended clearances around the rim and provide a direct route to the shower, basin, and toilet.
Coordinate services before installation, routing waste through the shortest practical run and confirming floor loading, ventilation, and access for maintenance.
- Keep at least 750mm of unobstructed circulation where possible.
- Align lighting to provide even illumination without glare on the water.
- Use Tile patterns to guide movement and reinforce the bath’s visual axis.
Select Color schemes that distinguish wet and dry zones while maintaining cohesion. Continue wall finishes behind the bath only when waterproofing and cleaning access remain practical.
Check door swings, radiator positions, and storage locations on the plan before finalising every fixture.
Choose a Freestanding Bath With Sculptural Appeal
Choose the bath as a three-dimensional centrepiece, evaluating its silhouette, proportions, and finish against the room’s scale and architectural lines. A gently curved form can soften rectilinear architecture, while a crisp, geometric profile reinforces contemporary detailing. Check the rim height, internal depth, and overall length against ergonomic requirements; visual drama shouldn’t compromise comfortable bathing.
Sculptural elegance depends on controlled proportions, consistent radii, and a finish that remains refined from every viewpoint. Your material selection also affects weight, thermal performance, durability, and visual character. Cast stone offers substantial mass and a matte, tactile surface; acrylic provides lighter handling, smooth colour, and efficient heat retention; enamelled steel delivers a sharp profile with a resilient gloss.
Specify the waste, overflow, and tap compatibility early, then inspect samples under the bathroom’s planned lighting.
Position the Freestanding Bath for Maximum Impact
Centre the bath strategically to establish clear visual balance and preserve efficient circulation around it.
Align its strongest axis with the room’s primary sightline, such as the entry, window, or feature wall, so it frames the focal view.
You’ll create greater impact when the bath’s position reinforces the room’s architectural geometry.
Centre the Bath Strategically
Position the freestanding bath where its silhouette commands the room without obstructing circulation, usually on the primary sightline from the entrance or aligned with a central architectural feature. Maintain at least 750mm of clear space around it, checking door swings, shower access, and cleaning routes before fixing services. Centre the tub against the room’s structural geometry rather than relying solely on visual symmetry.
- Align the bath’s centreline with a window, ceiling beam, or vanity axis.
- Confirm waste positions and floor loading before final placement.
- Preserve consistent clearances to walls, furniture, and heated towel rails.
Use Color coordination to connect the bath’s exterior, fittings, and surrounding finishes without making every surface identical. Introduce Material contrast through stone, timber, or textured tile to define the installation zone and give the tub visual weight.
A precisely centred bath will feel intentional, stable, and proportionate, making it the room’s dominant architectural element.
Frame the Focal View
To maximise impact, orient the freestanding bath toward the room’s strongest visual axis, such as the entrance, a window, or a feature wall, while keeping essential circulation unobstructed. Maintain at least 750 mm of clear passage around its accessible sides, adjusting the dimension to suit your layout and building standards.
Use the bath’s silhouette to establish a deliberate sightline: align its centre with a window mullion, pendant, niche, or architectural opening rather than placing it arbitrarily. Frame the view with balanced vertical elements, such as fluted panelling or symmetrical wall lights, without crowding the tub.
Coordinate the Color palette across tile, stone, and joinery to reinforce visual unity. Then add restrained Decorative accents—stools, towels, or vessels—to direct attention without competing with the bath.
Pair the Bath With Luxury Fixtures and Finishes
Coordinate premium fixtures with your freestanding bath to establish a consistent design language and functional hierarchy.
Layer refined finishes—such as brushed brass, polished chrome, and natural stone—throughout the room, but don’t exceed two or three complementary tones.
This controlled palette will reinforce the bath’s focal position without competing with its form.
Coordinate Premium Fixtures
A freestanding bath achieves a cohesive luxury look when you pair it with fixtures and finishes that reinforce its form, scale, and material palette. Begin with Materials selection: match the tap, waste, overflow, and shower controls to the bath’s construction, whether that’s polished stone, enamelled steel, or composite resin.
Prioritise compatible specifications, including flow rates, connection positions, and corrosion resistance, so performance matches appearance.
Use Color coordination to establish a controlled visual hierarchy. Select one dominant metal finish, then repeat it consistently across visible hardware:
- Choose wall- or deck-mounted taps that suit the bath’s proportions.
- Align the basin mixer, shower controls, and towel hardware with that finish.
- Specify concealed valves and clean escutcheons to protect the bath’s silhouette.
You’ll create a deliberate, balanced focal point without competing fixtures distracting from the bath.
Layer Refined Finishes
With the fixture palette established, layer refined finishes to give the freestanding bath greater depth and definition. Use Color coordination to connect the tub’s exterior, wall surfaces, and hardware without making every element identical. For example, pair a matte white bath with warm limestone, brushed brass, and softly veined porcelain.
If you choose a darker tub, balance it with pale stone and controlled metallic accents to preserve visual lightness.
Material selection should reflect performance as well as appearance. Specify nonporous porcelain or sealed natural stone around splash zones, and confirm that each finish withstands moisture, cleaning chemicals, and daily temperature changes.
Introduce texture through honed stone, fluted cabinetry, or ribbed glass, but limit competing patterns. You’ll create a deliberate hierarchy: the bath remains the anchor, while surrounding finishes reinforce its sculptural presence.
Frame the Freestanding Bath With Light and Views
Position the freestanding bath where natural light and carefully directed fixtures can emphasize its silhouette without creating glare. Use the window as a compositional backdrop, but control privacy with translucent glass or precisely positioned screening. Your view optimization should preserve the strongest sightline while keeping the bath visually dominant.
- Specify dimmable, high-CRI fittings to reveal the tub’s finish accurately.
- Install concealed linear lighting beneath ledges or behind wall panels for balanced lighting ambiance.
- Aim adjustable downlights across adjacent surfaces, not directly into the water or your eyes.
Coordinate colour temperature across daylight and artificial sources, typically around 2700–3000K, so the room feels cohesive after sunset. Keep reflective finishes restrained near the window; excessive sheen can scatter light and weaken the focal effect.
Frame the bath with negative space, allowing its curved profile to read clearly from the entry.
Solve the Plumbing and Practicality Challenges
Plan the freestanding bath’s waste, supply lines, and access points before finalizing its position, because a sculptural installation still requires reliable serviceability. Confirm the floor structure can support the filled tub, occupants, and fittings, then coordinate joist positions with the waste route.
You’ll often need plumbing upgrades, including a trap configuration, concealed isolation valves, and a correctly sized hot-water supply. Specify floor-mounted taps only after you’ve verified their penetrations won’t conflict with pipes, heating, or structural members.
Preserve access to the waste connection through a removable panel or nearby service void; avoid permanently sealing critical joints beneath the bath. Use accurate set-out dimensions to maintain clear circulation and support space optimization, while complying with local drainage gradients, waterproofing requirements, and manufacturer installation instructions.
Test every connection before closing floors or finishes.
Create a Cohesive Luxury Bathroom Retreat
Once the plumbing and structural requirements are resolved, treat the freestanding bath as the anchor for a coordinated luxury scheme. Repeat its finish, silhouette, or material in carefully selected fittings, worktops, and accessories. Use restrained color schemes to establish continuity: warm stone, brushed brass, and muted paint create visual depth without competing with the bath.
Balance tactile surfaces with practical performance, specifying slip-resistant flooring, moisture-resistant joinery, and durable sealants.
- Align wall and floor tones to extend the room’s perceived proportions.
- Position layered lighting to highlight the bath while eliminating glare.
- Integrate storage solutions that conceal toiletries and preserve clear sightlines.
Keep the bath visually dominant by limiting contrasting forms. A wall-mounted vanity can provide efficient storage while maintaining floor visibility, and a heated towel rail adds comfort without clutter. Finish with coordinated textiles and hardware, ensuring every element supports a calm, deliberate retreat.
Frequently Asked Questions
How Much Does a Luxury Freestanding Bath Typically Cost?
You’ll typically pay £700–£2,000 for a luxury freestanding bath, excluding installation. Bathtub materials, size, brand, and finish affect pricing, while installation challenges, reinforced flooring, plumbing relocation, and specialist labor can increase costs considerably.
How Long Does Installing a Freestanding Bath Usually Take?
You’ll usually need one to two days to install a freestanding bath, like placing a centerpiece. Bathroom aesthetics, Plumbing considerations, access, waste positioning, floor preparation, and testing can extend the schedule, especially during renovations.
What Maintenance Does a Freestanding Bath Require?
You’ll need regular Cleaning routines: rinse surfaces, use non-abrasive cleaner, inspect seals, and clear the waste. Monitor Water quality effects, removing limescale promptly; don’t use harsh chemicals that could damage finishes or plumbing components.
Can a Freestanding Bath Be Installed in a Small Bathroom?
Yes, you can install a freestanding bath in a small bathroom, if measurements confirm adequate clearance. Space optimization and design flexibility help; choose a compact model, wall-mounted fittings, and maintain safe access around it.
Are Freestanding Baths Comfortable for Regular, Everyday Use?
Yes, you’ll find freestanding baths comfortable for daily use when you choose supportive contours, sufficient depth, and stable access. Bath aesthetics enhance enjoyment, while precise Water temperature control maintains comfort throughout every soak.
Conclusion
A freestanding bath can define a luxury bathroom when every decision supports its presence. Plan the layout around clear sightlines, select a sculptural model with suitable proportions, and coordinate fixtures, finishes, lighting, and views. Resolve plumbing access and maintenance before installation, so practicality never compromises design. When these elements work together, the bath becomes more than a fitting: it anchors the room like a carefully placed piece of sculpture, creating a refined, functional retreat that feels intentional from every angle.