
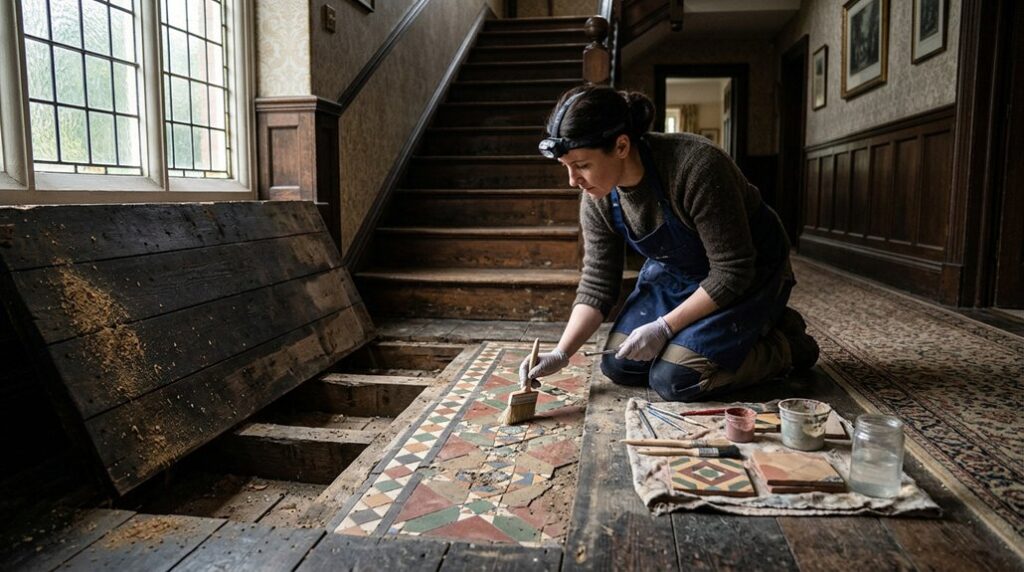
Like an architectural time capsule, hidden Edwardian floor tiles can reveal a property’s original character when you investigate beneath later coverings. You’ll need to inspect thresholds, fireplaces, and passages with angled light, then map surviving motifs before lifting anything. Careful removal, damage assessment, and precise tile matching will determine whether the pattern can be restored authentically. Moisture control and breathable protection matter afterward—but the first discovery may expose a more complex repair than expected.
Key Takeaways
- Survey thresholds, fireplaces, hallways, and floor transitions using low-angle light to reveal hidden Edwardian tile patterns and borders.
- Document cracks, damp, salt deposits, loose corners, grout loss, and concealed fixings before lifting any coverings.
- Match missing tiles by measuring originals, studying glaze and maker marks, and testing handmade replacements beside surviving tiles.
- Map the original layout, including axes, borders, repeat units, and asymmetries, before positioning replacement tiles.
- Protect repairs with moisture control, breathable sealers, gentle cleaning, suitable mats, furniture pads, and annual inspections.
Discover the Hidden Edwardian Floor Tiles

Look beneath worn carpets, loose boards, and layers of paint to identify the Edwardian floor tiles hidden in your home. Start at thresholds, fireplaces, hallways, and areas where flooring changes; these locations often preserve original surfaces.
Use a torch at a low angle to reveal grout lines, geometric motifs, and muted encaustic colours. Edwardian tiles commonly feature repeating borders, floral accents, and symmetrical layouts, while Victorian design may appear in earlier adjoining rooms.
Photograph each exposed pattern, then record its position on a simple floor plan. Check tile dimensions, edge profiles, and glaze characteristics against architectural references or local conservation archives.
Look for manufacturer marks on accessible edges and compare motifs with period catalogues. This documentation helps you establish historical significance before planning any intervention.
Assess Damage Before Lifting the Covering
Before lifting carpet, vinyl, or boards, assess the tiles’ condition from every accessible edge. Use a torch and low-angle light to identify cracks, loose corners, damp staining, salt deposits, or hollow-sounding areas. Photograph each finding, record its location on a simple plan, and note grout loss, surface wear, and previous patches.
Don’t probe unstable joints or force an edge; movement can enlarge fractures and release sharp fragments. Check whether coverings conceal nails, tack strips, adhesive, or uneven subflooring, and wear gloves, eye protection, and suitable footwear to maintain flooring safety.
Test for moisture with a meter where staining appears, while avoiding destructive sampling. Consider the floor’s historical significance before disturbing finishes, and document patterns, borders, and surviving colours accurately. This evidence will guide safe, controlled exposure.
Repair and Match Missing Floor Tiles
Once the exposed floor has been documented, identify each missing tile’s original size, thickness, shape, colour, and border position before ordering replacements. Measure adjacent tiles and check surviving pieces for manufacturer marks, firing variations, and glaze depth. Photograph samples under neutral light, then provide these records to a specialist supplier or conservation tiler.
You’ll achieve a closer match by commissioning hand-made replacements rather than accepting modern stock dimensions. Test each proposed tile beside the originals; reject pieces with incompatible tone, sheen, or surface texture.
For Historical significance, retain sound fragments and label removed material instead of discarding it.
Complete tile cleaning before fitting, using a pH-neutral solution and minimal water. Bed replacements in a compatible mortar, set them flush, and allow proper curing without disturbing neighbouring tiles.
Restore the Original Edwardian Tile Pattern
Re-establish the original Edwardian tile pattern by mapping the surviving layout before fixing any replacements. Photograph each section, record dimensions, and mark grout lines on a scaled drawing.
Identify the central axis, borders, corner details, repeat units, and any intentional asymmetry. Use surviving colours, motifs, tile sizes, and orientation as primary evidence; don’t infer a pattern from modern catalogues alone.
Where evidence is incomplete, compare undisturbed areas, archived photographs, and period manufacturers’ designs, documenting every conclusion.
Lay loose replacement tiles over the mapped area first, checking alignment, spacing, and tonal balance from several viewpoints.
Preserve original tiles in their exact positions whenever possible, because relocation can distort the design.
This disciplined approach supports Tile preservation and Historical accuracy while ensuring repairs reinstate the floor’s Edwardian geometry rather than creating a plausible but incorrect pattern.
Protect the Repaired Floor for Years
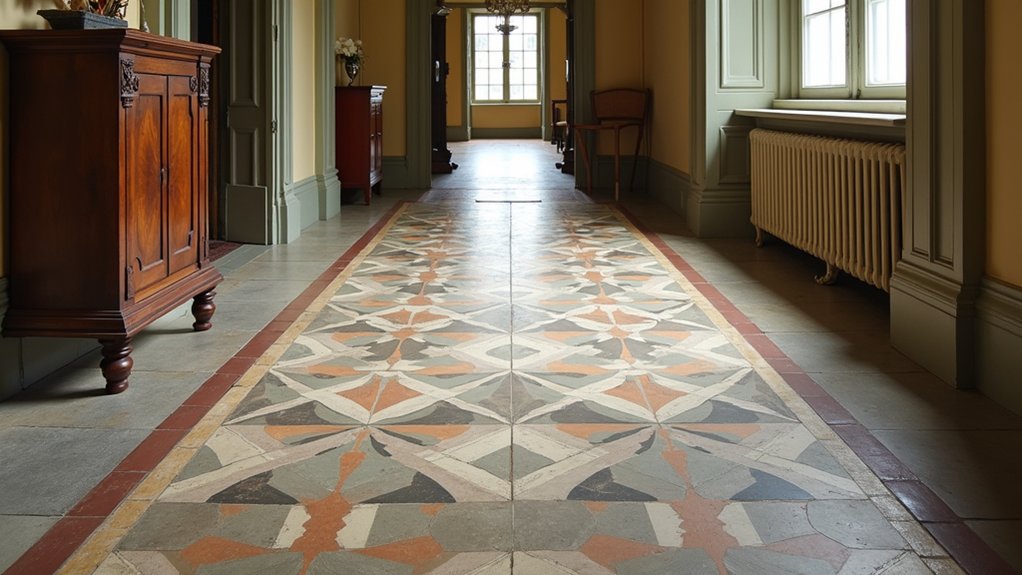
With the Edwardian pattern restored, protect the repaired floor by controlling moisture, abrasion, and unsuitable cleaning. Choose compatible Sealing techniques only after the grout and replacement tiles have fully cured. Apply a breathable, penetrating sealer according to the manufacturer’s coverage and curing requirements; avoid glossy films that can trap moisture or alter historic colours.
- Fit coir or cotton entrance mats, but use breathable, non-rubber backings.
- Add felt pads beneath furniture and lift items instead of dragging them.
- Sweep with a soft brush, then mop sparingly with pH-neutral cleaner.
- Inspect annually for cracked grout, loose tiles, dampness, or sealer wear.
Blot spills immediately, keep standing water away, and maintain stable indoor humidity. Don’t use bleach, vinegar, abrasive powders, steam, or aggressive rotary machines. Record products, dates, and repairs so future maintenance supports long term preservation.
Frequently Asked Questions
Are Hidden Edwardian Tiles Historically Valuable?
Yes, hidden Edwardian tiles can hold Historical significance, especially with original patterns, makers, and installation. You’ll face preservation challenges from damage, alterations, and moisture, so document, assess, and conserve them professionally before restoration.
What Tools Are Needed to Uncover Covered Floor Tiles Safely?
You’ll need practically every safe tool imaginable: gloves, goggles, respirator, knee pads, utility knife, scraper, pry bar, brush, vacuum, moisture meter, and buckets. Follow DIY safety and excavation techniques; never force tiles.
Can Reclaimed Tiles Be Used for Authentic Replacements?
Yes, you can use reclaimed tiles for authentic replacements. Verify reclaimed authenticity by comparing clay, dimensions, thickness, glaze, and wear. Prioritize tile matching, then dry-fit pieces and guarantee compatible adhesive, levels, and grout.
How Long Does a Tile Restoration Project Typically Take?
You’ll typically need one to three weeks, but the timeline can shift unexpectedly. Tile removal, substrate repairs, surface cleaning, matching, curing, and sealing each require careful scheduling; larger areas or damaged foundations extend completion.
Should Professionals Handle Protected or Listed Historic Floors?
Yes, you should hire professionals for protected or listed historic floors. They’ll follow restoration ethics and preservation guidelines, obtain approvals, document existing conditions, use compatible materials, and prevent irreversible damage during repairs.
Conclusion
Uncovering Edwardian tiles rewards patience: historic floors often survive beneath later coverings for more than a century, yet moisture and abrasion can quickly erase their evidence. Map motifs, photograph dimensions, and lift coverings slowly, then repair rather than replace wherever possible. Match clay, colour, and grout width before reinstating the pattern. Finally, control damp, clean gently, and use a breathable sealer. By following these steps, you’ll preserve both authentic craftsmanship and the floor’s future service life.

